Saturday, June 28, 2008

Craft Booth With PVC Pipe

Here's one I used several years ago at a craft fair where you could not have side walls over 4' high. They wanted a more 'open' concept rather than have a bunch of Ez-ups with side walls blocking views. My hubby graphed out the display in PVC pipe and I used sheer curtains threaded onto the pipe sections.

It was very easy to put up. The second pic is a wider view, during setup. In the right corner, I set up 2 of my knitting machines and did demos. It still allowed me to hang some of my lightweight sweaters and such along the back top bar (not shown).

It wasn't my preferred way for display, but it worked quite well. The shorter side walls were very nice for most of the crafters.


~ Marge ~

Thursday, June 26, 2008

There are days ...

... when one should not even step out of the house! I've had more than my share of those lately. All the horrid California fires have created a huge amount of smoke over here in the Washoe Valley, Nevada. We actually hit Stage 2 Alert for health problems here, something we've not done in 20 years or so.

I feel so bad for everyone over there in California and the destruction they are dealing with each day as the fires spread. My son and his family live in the Sacramento area but they are currently down in Disneyland. They will be returning home very soon and so far, they have not had any major problems at their condo. I'm praying for ALL who are affected by this devastation.

Could you possibly help?? The Red Cross has put out a plea for donations. Please help them if you can. Put a link on your blog, in your email signature file, anywhere you can on the net to help this most worthy organization. If you can't give cash, perhaps you could donate blood?

Please think about it.

~ Marge ~

Monday, June 23, 2008

PIFs - PIFs & More PIFs


I've been busy putting up several PIFs in my Etsy Shop.

These are TRUE PIFs, completely free. My gift to you. You can find them under SEASONAL. They are all knitting patterns and I have them available in both hand knit graphs and machine knit .pat files using DAK (Design-A-Knit) software.


~ M
arge ~

Saturday, June 21, 2008

Knitting For Profit - How NOT To Be Discouraged

So many times when I teach machine knitters about realizing a profit in their knitting business especially for craft fairs / shows, one of the major comments is that they get discouraged trying to build up their stock. The following is a short excerpt from my eBook, Craft Fair Survival Guide which is available in my Etsy Store ...
  • Get pieces/parts knitted / constructed. Stacks/bags/bins of items knitted, but not necessarily blocked & sewn.
  • Doing something from beginning to end can actually make you feel like you’re not getting anywhere and can put one off when the stack seems to grow at about the speed that rocks erode!
  • Plot out your yarns you’ll need and figure out how many items (say sleepers) you can get from each cone. Sit down with that cone on the machine and don’t start another cone until that one’s finished with those sleeper parts.
  • And if there’s some on the cone left over, remember my own method of knitting some quick-fix items before switching. You’d be surprised how efficient you can become when you want to get on to another color of yarn -- you get sick of that color after awhile when it sits there facing you each time you sit down to knit.
  • You’re in this for a profit, and we all have to do things we really don’t like if we really want to realize a good, solid income goal.
~ Marge ~

Friday, June 20, 2008

Budgeting Time Just For YOU!

Time is precious. It can also mean money for your crafting business. But without some time for your personal life, what good is it? 'Pay' yourself some time as well to explore your inner self, embark on a new hobby or sport, or perhaps resurrect one that’s been lying dormant in your closet for months or even years. Why? To hedge against burnout. Statistics show that people who are driven to devote every waking hour to their business often experience severe health or psychological problems and thus sabotage their own efforts or business goals in the long run. The sad part is, they often have no idea ‘why’.

By scheduling personal time, you have the opportunity to relax, set aside any business worries and discover new talents within yourself. Fitness levels or previous skills needn’t be a factor in deciding what you want to do with this time you now have available. Check with your local community college or adult education office. They have numerous non-credit courses available for reasonable fees that will help you flush the worries and stress of the business world out of your system … even if only for a few precious hours.

It only hurts for a little while to carve a few hours out of your busy schedule. C’mon, give it a try.

~ Marge ~

Thursday, June 19, 2008

Blog Block

Have you ever 'run' to your computer to blog with a super idea for a post, had something distract you, then come back and can't, for the life of you, remember WHAT you were going to write about???

That's my quandary right now. Whatever BRILLIANT post I was going to make has completely flown out of my brain.

Sigh ...

Wednesday, June 18, 2008

I Know It's Only June, but ...

... I'm already gearing up for Christmas. I'm involved in a Christmas In July private show here locally as well as participating in the Etsy Christmas In July promotion that several sellers are putting together.

This little Rudy Lapel Pin is a huge seller here locally. I've already got orders for dozens and am JUST about done with the knitting. The machine knit pattern for this little cutie and several other Christmas items is available in my Etsy Shop.


And of course, little mini-stockings for ornaments or to put a luscious DOVE chocolate or Hershey's Kiss inside as a package topper. I've also rolled up money and tucked it inside for the grandkids. They love those! Always a pleaser.


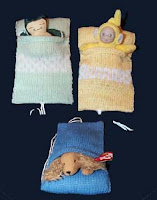
The little sleeping bags are so quick to knit up on your knitting machine and kids just love them! Those shown are with a few of my grand-kids stuffed characters/animals they collect. If you have kids who collect these types of cute little characters and animals, consider making little sleeping bags or pouches for each them!

I also do up a bunch of Barbie Doll and American Doll sized sleeping bags in velvety soft Rayon Chenilles. The little girls who come to the shows really love them and often a parent will 'signal' me to put it aside and then pop back to my table without the little girl and buy it for a gift.


I've already purchased all my yarns, have cleaned and thoroughly oiled the main knitting machines I will be using and am ready to knit! If I can get my schedule to settle down, that is ... easier said than done at times.

~ Marge ~

Gas Prices & Crafting


Has the rise in gas prices affected your crafting?

I've had to curtail browsing & shopping for craft supplies not only within, but outside the Reno/Sparks area. No longer can I just get in the car and visit several stores on a whim. Any driving I do has to be planned to include craft stores while I go about my personal business. And since the craft supply stores aren't that close to my Doctor's office, or places like that, it does put me into a quandary.

Why not do all my shopping online? Well, I DO a lot more online now, but it's the personal interaction with shops that I miss. I had to be down in the south end of town not long ago and 2 of the employees at Michaels hailed me by name and asked how I was doing and why hadn't they seen me in 'forever'. The store wasn't half as busy as it usually was on a Saturday. Sad.

Sometimes I only need a few items, and I need them right away (special orders, building craft fair stock). Not everything I do in my crafting allows me to stock up with case lots of items, just from a 'Where do I put it?' standpoint.

I've also had to curtail a lot of yard saling and thrift store adventures. That bites. Maybe I'll put wheels and a little battery motor on my rocking chair!


~ Marge who is pondering what she can do about it ~

Sunday, June 15, 2008

Out Of The Closet

Monsters lurk in the darkest regions of my closets. I know they do. And if I dig in there, I know they’ll get me.

Well, that’s the excuse my kids used while growing up and I thought it was so reasonable that I used it for years to avoid cleaning out closets myself. When I say cleaning the closet, I mean right down to the carpeted floor cleaning. Not just move a bit here, move a bit there … nah, that’s not cleaning; it’s cosmetic re-arranging to make you feel better about the mess (monsters) you know are still residing in there.

I was wanting to become more adventurous in my life, and in order to do that, some of my home-front life needed some drastic changes. Number one on my list was the dreaded bedroom closet. I knew I had items nestled away in there that I would need on some adventures, but they kept burrowing deeper each time I did a cursory search. So it was time to stop procrastinating and get down to it! Tools needed …

Pith helmet, whip, chair, canteen …. oops, sorry, wrong list! Lemme see … where is that list?? Ah, here we go:

#1 Priority – GET HELP! When I clean closets, the first thing I do is coerce … er umm, bribe … find some help. STRONG help. I know that I probably put those now-two-ton boxes in there by myself when we moved here, but I sure can’t seem to lift them now! So I snag a hubby or son or son-in-law to give me help. Promises of a pan of brownies or homemade bread usually is sufficient around my house. And they have to keep their mouths shut, offering no opinions or suggestions in order to get those brownies. That is a major rule.

#2 Pull EVERYTHING out of the closet, hanging clothes and all. I don’t know about you, but when we moved into this house, I was exhausted most of the time to the point of really not caring where everything went. My only criteria was stick it away somewhere so long as it wasn’t left out for someone to trip over.

#3 Get a couple of large boxes or lawn/leaf trash bags. You’ll be filling these with items you really don’t want anymore but are in good enough shape to donate and the other will be out-and-out garbage fodder.

#4 Take a good look at the mounds of items now on your bed and covering probably every spare inch of floor space. All that came out of there ???

#5 Sort items by person. If that person doesn’t live/sleep/reside in that room, tell them to come get it, or better yet, deliver it to their room / house. Preferably if they’re not home … makes for less hassle. My favorite thing is to wrap a piece of Christmas ribbon around the stack/pile/box and tell them Merry Christmas.

#6 Now draw a quick sketch of your closet space. If there’s a deep dark corner way in the back that you don’t get to very often, how about putting seasonal items back there? Or perhaps old sentimental items such as high school yearbooks, bowling trophies, boxes of baby clothes (my youngest ‘baby’ is now 33). If you have a partner you share closet space with, eyeball how much each would need and draw a line down through your sketch. Ours is 70/30, mine being the 70%, naturally.

#7 Thoroughly clean every surface in the closet.

#8 Begin re-packing the closet with the items you have determined can go back into those dark corners. And for heavens sake, MARK the boxes you stick back there so a quick scan with the flashlight will tell you what is in the boxes a year from now.

We’re getting down to the end now … you’ve thrown away, donated, returned to owner all the extraneous stuff you had gathered in there. If you’ve done it diligently and ruthlessly enough, your pile should be drastically reduced by now and everything will fit into place like it should.

#9 Take a bubble bath with candlelight and a cup of herbal tea or perhaps even a glass of wine.

You're done.


Friday, June 13, 2008

Kiddie Kuffs Has Launched!! WOO HOO


I bit the bullet, got the paperwork online and finally registered my Kiddie Kuffs as a service mark with the U.S. Patent & Trademark Office. So now, I've got some of my Kiddie Kuffs up in my Knits-n-More Etsy Store! WOO HOO! I've been marketing these little cuffs for umpteen years and finally made the name legally mine. All mine.

I should have done it years ago and there's really no sane reason why I didn't! I've copyrighted patterns and my short fiction and so many other things for years, trademarked my MKDesigner name, but for some reason, I just didn't get around to registering the Kiddie Kuffs. How silly of me! Well, now they're there on Etsy.

They've always been something I'd whip up quickly on the Brother 390 knitting machine (bulky mode) for craft fairs that are held at schools or where there will be high children traffic. So now I have to get my knitting act together and make a bunch more.

~ Marge ~

Thursday, June 12, 2008

My 2nd Etsy Shop Now Participating

I've entered 4 of my handknit scarves into the mix for the Yart Sale on Etsy under my 2nd Shop, Knits-n-More.

Please come visit ALL the shops on Etsy who are participating in the First Annual YART SALE. Soooooo many lovely items by such talented artisans. There areYart Sale stores listed in Handmade, Supplies and Vintage! Something for everyone. The specials they are offering are wonderful -- don't miss out on all the fun! It runs from today, June 11th through the 20th.

Wednesday, June 11, 2008

YART SALE!

No, that's not a typo --- many of us on Etsy are having a YART SALE from June 11 through June 20th. Gonna be a real kick! We're making up little logos to have on our blogs and websites as well as creating 75x75 ones for our avatars for that time span.

I've put up all of my zippers and plastic canvas pattern leaflets into my YART SALE section. Some really great bargains in there, so click on this pic & check it out!

Tuesday, June 10, 2008

Supplies & Where To Find Them

It's not easy, sometimes, to find the RIGHT crafting supply at the RIGHT price. My first stop now is on Etsy, doing a search under Supplies; tags & titles for items (i.e. beads, yarn, etc.) where you will find hundreds, if not thousands of items. I like to check out any specials they may have (i.e. SNS - Saturday Night Specials) listed in the Forums under Promotions. Usually some great bargains there!!

Here are some other sites I like to visit as well:

Create For Less - Wholesaler of sewing, scrapbooking, quilting, decorative painting, floral and garden, and other general crafting and hobby supplies. Also offers online shopping and craft advice.
Norden Crafts, Inc. -
Supplier to the needlecraft industry.
eBottles -
Offers a selection of bottle, jars, and closures for various crafts.
Duncan Crafts -
Hobby ceramics and craft paint and glue manufacturer.
Dai Jewels -
Supplies semi-precious and precious gemstone beads.
Hats By Leko -
Supplier of millinery supplies such as: hats, trims and flowers.
Bead Corp - Distributor of imported and domestic beads, charms, findings, and tools.
All Star
- Eyelets, conches, settings, nailheads, acrylic jewels, sequins, and caviar beads.

Several of these do require registration with your business licensing, so be prepared with your documentation when entering the sites. I'll add more from my mega-list as time goes on.

Marge in Reno

Sunday, June 8, 2008

Yikes! Got Behind Again

Where did yesterday go ??? I know we must have had a Saturday, unless there was a tuck in the fabric of time. Ah well. Time to get caught up and get on with life ...

We had an earthquake here in Reno, NV just about 45 minutes ago (10:53 a.m.) Only registered 3.8, but was enough to shake things up a bit ... like our nerves. We used to live in California and were living in Northern California when the 7.1 quake hit back in the 70's. So it always rattles my nerves a bit, wondering if a larger one is coming. You'd think I'd be used to it by now, but I'm not. Only made the whole house seem like it was rolling a bit, more side-to-side rather than a bang then up and down. Rolling ones are easier for me to handle.

Ah HA! I 'found' yesterday !! No wonder it seemed to disappear on me, I'd been stuck in our walk-in closet trying to sort through several small tubs of craft stuff for HOURS. By the time I knit up some more bottle cozies and some wristlets a customer ordered, I took a nap and literally slept through the dinner hour. Good thing hubby can fend for himself and our son and grand-daughter weren't due back from one of their mini-trips until quite late.

Other than waiting around for aftershocks (which WILL hit - according to the news report, we've had 15 quakes so far today, many of them we don't feel), I'm going to be reveling in the fruits of my labors yesterday (closet cleaning) and start up some more hand knit items for fall shows, sew up the cozies and the wristlets and then make hubby take us all out to dinner. Sounds like a plan to me.

~ Marge ~

Friday, June 6, 2008

Easy Casing 'Pulling Thread'

I received an email from a lady who had attended one of my little workshops about 12-15 years ago. One of the small how-to's I showed was putting a Pulling Thread into a casing as you knit. I no longer have the handouts available (2 computer crashes in the ensuing 12+ years) so while I was knitting the other day, I took a few pics as I was doing the casing. If you need additional details, please feel free to email me.

When I need to pull elastic or ribbon through a narrow casing, I do it while I'm closing the casing on the machine. This example has waste yarn, then ravel cord and then 6 rows - it needed to be very narrow for the elastic I was using in that project.

The thread in there is what I call the Pulling Thread. My Mom called it that in her sewing so I've always just used that term. I don't know how many times she'd be sewing a casing and lay a piece of yarn or cording in there before sewing.

I laid the Pulling Thread in the 'trough' between the stitches on the machine and the stitches I was hanging onto the same needles when closing the casing. Keep the Pulling Thread in the trough as you go along, making sure you do NOT let it catch on the needles or with the yarn. Every once in awhile, I'll pause my work and make sure the Pulling Thread is still free of any catches by taking both ends and sliding it back and forth.

It's a LOT easier to correct any issues with the Pulling Thread as you go along rather to find out once you take the work off the machine that OOPS!, it's caught!! Once you're done, just attach your elastic or ribbon or whatever to one end of the Pull Thread and you'll be able to easily pull it through your casing.

~ Marge ~

Thursday, June 5, 2008

Youngest Grand Daughter Graduates ...


... from kindergarten. Wow! I'm getting old. Her teacher informed us that our kinder-grad would be graduating High School in the class of 2020 .... EEEEK!

I'd meant to get this up online yesterday, but life got in the way.

Isn't she ADORABLE???

~ Marge ~

Tuesday, June 3, 2008

Grandmother Sproule's Knit Edgings:

© MKDesigner for Millicent Amelia Jane Montague Sproule

I found these patterns among my Grandmother's belongings, and they were written in her lovely, spidery handwriting. I have a few pieces of the linens she embellished with these edgings and I treasure them. ENJOY!

Pattern #1:
Starting at short end, cast on 6 st and knit across.
1st row: K2, YO, K2 tog, YO, K2 (7st)
2nd & all even rows: P across
3rd row: K2, YO, K2 tog, YO, K3 (8 st)
5th row: K2, YO, K2 tog, YO, K4 (9 st)
7th row: K2, YO, K2 tog, YO, K5 (10 st)
9th row: K2, YO, K2 tog, K3, K2 tog, K1 (9 st)
11th row: K2, YO, K2 tog, K2, K2 tog, K1 (8 st)
13th row: K2, YO, K2 tog, K1, K2 tog, K1 (7st)
14th row: P across
Rows 3 thru 14 are one pattern, work in pattern for desired length.

Pattern #2:
Starting at end,, cast on 11 st and knit across.
1st row: K3, (YO, K 2 tog) 3 times, YO, K2 (12 st)
2nd and all even rows: P across
3rd row: K4, (YO, K2 tog) 3 times, YO, K2 (13 st)
5th row: K5, (YO, K2 tog) 3 times, YO, K2 (14 st)
7th row: K6, (YO, K2 tog) 3 times, YO, K2 (15 st)
9th row: K7, (YO, K2 tog) 3 times, YO, K2 (16 st)
11th row: K8, (YO, K2 tog) 3 times, YO, K2 (17 st)
13th row: K6, K2 tog, (YO, K2 tog) 4 times, K1 (16 st)
15th row: K5, K2 tog, (YO, K2 tog) 4 times, K1 (15 st)
17th row: K4, K2 tog, (YO, K2 tog) 4 times, K1 (14 st)
19th row: K3, K2 tog, (YO, K2 tog) 4 times, K1 (13 st)
21st row: K2, K2 tog, (YO, K2 tog) 4 times, K1 (12 st)
22nd row: P across

Rows 3 through 22 constitute one pattern. This one is especially lovely, I had trouble stopping, made 8 inches and it pressed up so pretty.

Pattern #3:
Starting at end, cast on 15 st and K across.
1st row: Sl 1, K1, K2 tog, YO, K2, YO, K2 tog, K2, K2 tog, YO, K2 tog, K1 (14 st)
2nd row and all even rows, Knit across
3rd row: Sl 1, K2, YO, K2 tog, K4, K2 tog, YO, K2 tog, K1 (13 st)
5th row: Sl 1, K3, YO, K2 tog, K2, K2 tog, YO, K2 tog, K1 (12 st)
7th row: Sl 1, K4, YO, (K2 tog) twice, YO, K2 tog, K1 (11 st)
9th row: Sl 1, K3, K2 tog, YO, K2, YO, K2 tog, incr in last st (12 st)
11th row: Sl 1, K2, K2 tog, YO, K4, YO, K2 tog, incr in last st (13 st)
13th row: Sl 1, K1, K2 tog, YO, K2, YO, K2 tog, K2, YO, K2 tog, incr in last st (14 st)
14th row: Knit across.

Rows 3 through 14 complete one pattern. I had the 'devil' of a time with this one, kept getting lost, but after about 4 false starts, it worked out. Quite nice looking.

Hope you enjoy these. I've already made plans to use them as embellishment on some of my machine knit sweaters in fine yarns. They are all straight edgings.

~ Marge ~

Monday, June 2, 2008

Quick Machine Knit Tips

Tip #1 - Avoid Disasters!! Remove all dangly jewelry (necklaces, bracelets, even watches) before sitting down to your knitting machine. Needles get caught and you KNOW they'll break at the most inopportune time! Even high profile rings can be a problem. Wear short sleeved (or at the most, 3/4 sleeve) garments when knitting. Tie or clip back long hair.

Tip #2 - If your knitting machine seems to grind its way across the bed after you've knit several rows, more than likely static has built up. I keep my can of LoriLyn spray at hand and spray a soft, lint-free cloth and run it over the bed 2-3 times after the carriage has made a pass and the noise goes away! BEWARE if you use some of those static-free dryer sheets! They can disintigrate easily causing bits to get into the needle channels. They can also leave a residue on the needlebed which can build up to a real 'gunky' mess after time passes.

Tip #2 - Marking Your Seams – if you’re knitting a fairly long piece, place a marker thread on each end needle each time you move your weights up (I do it every 30 rows). When you get ready to sew up those seams, just match up those markers and pin so you can have neat seaming.

Tip #3 - Pre-Shrink Notions – I learned this tip from June Reed umpteen years (decades??) ago – If you’re using sewing notions such as bias tape, braid, ribbon, zippers etc., pre-wash and shrink it before attaching it to washed and blocked knits. Nothing worse than all your hard work puckering!! Guess I'm a skeptic, but I don't necessarily believe labels that have ' pre-shrunk'.


Sunday, June 1, 2008

2x3 Gathered Scalloped Rib


2x3 Gathered Scalloped Rib – A Variation - By Marge Parker

Text © 1999 MKDesigner

One of my grand daughters likes sleeve cuffs to be wide ribbing and have a bit of a ‘gathered’ or puffy look when the sleeve starts above that rib. I dug this pattern out of mothballs and she liked it. Originally, I’d developed this rib when doing those ‘mutton chop’ sweaters that were popular in the late 70’s. She didn’t want it quite so pronounced so we shortened the ribbing for her. This is my method of doing this instead of ribbing of perhaps 1x2 and then increasing stitches evenly across the work. I really hate doing that. By having an open stitch on either side of the latched up center stitch, there’s less bulk and more stretch to the ribbing in my opinion – and it makes the grand daughter happy.

Sample knit on Brother Convertible ‘Bulky’ 9mm mode – Yarn: Red Heart 4-ply

Basic Needle Setup: (X=In Work O=Out of Work)

XXX OOO XX OOO XX ….OOO XX OOO XXX

You have 3 Working Needles on each end of the piece.

E-Wrap cast on over the In Work (X) needles.

Knit as many rows as you want your ribbing to be high.

First latch-up: Go under 2, grab the 3rd ladder, pull it under and over the 2 stitches. Go under 1 ladder, latch up the 2nd ladder and continue to the top of the ladders.

Place stitch onto the center empty (“O”) needle. Continue doing the same across the work.

Go back to the first latched up ladder and put the purl bar from the closest right “X” stitch onto the right “O” needle. Put the purl bar from the closest left “X” stitch onto the left “O”
n
eedle. Continue across the work.

Now all your needles are ‘in work’ and all have stitches. I personally prefer to do the central latchup first, let the work rest for a couple of minutes and then go back and fill in the other “O” needles from the purl bars. You can do it as you go across the work, this way is just easier for me. Knit rows for remainder of sleeve or whatever it is you’re making. The picture below shows the purl side of this ribbing.